Giving your child a haircut at home can seem intimidating – especially if they squirm, cry, or run at the sight of clippers.
But with a little patience, the right setup, and a step-by-step strategy, you can turn haircut day into a stress-free (and even fun!) experience for both of you.
Whether you’re avoiding the salon, saving money, or just need a quick trim between cuts, here’s how to safely and effectively cut your child’s hair using clippers – minus the meltdowns.
Also Read
What You’ll Need
Before you begin, gather your tools. A prepared setup helps everything run smoothly (and quickly).
Essential Tools:
- Kid-friendly electric clippers with guards (ideally quiet and cordless)
- Hair-cutting scissors for detailing around ears and neckline
- Cape or towel to protect clothing
- Comb and spray bottle (optional if you prefer damp hair)
- Booster seat or cushion to elevate your child
- Distraction tools: tablet, toys, snacks, music, etc.
- A second adult/helper (if available)
Tips: Choose a spot with good lighting and easy cleanup—like the bathroom, patio, or kitchen floor with a towel underneath.
Step 1: Prepare Your Child (and Set the Mood)
The first step to a smooth haircut? Make your child feel safe, involved, and excited about what’s coming.
Tips to prep your little one:
- Talk them through it: “We’re giving you a cool new haircut – just like a superhero!”
- Let them touch the tools (when unplugged!) to reduce fear
- Show them a video of another child getting a haircut
- Let them watch themselves in a mirror for a sense of control
- Offer a reward or treat afterward as motivation
Kids fear the unknown. Explaining things in simple, fun terms can make a huge difference.
Step 2: Choose the Right Clipper Guard Length
Clipper guards determine how much hair you leave behind. For beginners, it’s best to start with a longer guard, such as #4 or #5, which leaves about 1/2 inch of hair.
Common guard sizes:
- #1 (1/8″) – Very short buzz
- #2 (1/4″) – Clean, low-maintenance cut
- #4 (1/2″) – Good for beginners; leaves more room for error
Always test on a small section before committing to the whole head.
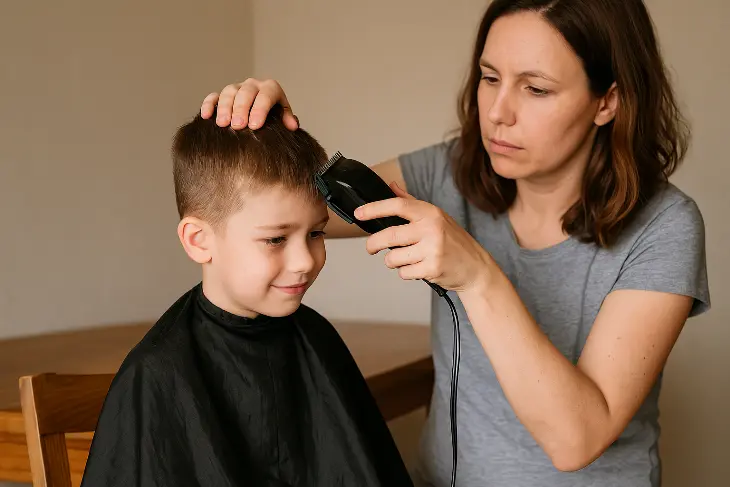
Step 3: Section and Start the Haircut
You’re ready to begin! Stick to this simple method to keep it organized and consistent:
1. Start at the back of the head
- Run the clippers upward, against the direction of hair growth.
- Move in small, slow passes.
- Don’t push too hard – let the clipper do the work.
2. Move to the sides
- Pull the ear down gently to avoid accidents.
- Keep the clipper moving evenly to avoid patchy areas.
3. Tackle the top last
- Switch to a longer guard or use scissors for a layered look.
- Comb forward and trim slowly from front to back.
4. Blend the transition
- Use a guard one size shorter between areas for a natural fade.
- Use a comb and scissors for soft blending if needed.
If your child moves suddenly, pause immediately – safety first!
Step 4: Clean Up Edges and Around Ears
This is where detail work comes in.
Use scissors to:
- Trim around the ears
- Shape the sideburns
- Define the nape of the neck
For extra precision, remove the clipper guard and carefully edge the neckline – but only if your child is calm and still.
Nervous about this step? You can skip it or use a trimmer with a safety guard.
Step 5: Keep Your Child Calm and Distracted
If your child struggles to sit still, use these tried-and-true distraction strategies:
- Play their favorite show or music video
- Offer a snack they can eat independently
- Let them hold a toy or pretend they’re the hairdresser
- Ask silly questions or tell a story as you work
Bonus: Let your child help clean up with a small broom or handheld vacuum – kids love to be involved!
Step 6: Clean Up and Celebrate
You’re done – great job! Now it’s time to:
- Wipe off loose hair with a towel or baby brush
- Let your child check their new look in the mirror
- Celebrate with a high five, treat, or a “fresh cut” photo
Don’t forget to sanitize your tools and store them safely for next time.
Common Mistakes to Avoid
Avoid these beginner pitfalls for a smoother experience:
- Cutting wet hair with clippers (only use on dry hair for best results)
- Starting with a short guard if you’re new
- Rushing the process – stay calm and patient
- Forgetting to blend between different lengths
Giving your child a haircut at home doesn’t have to be scary or stressful. With the right setup, a bit of practice, and a sprinkle of patience, you can achieve a neat, professional-looking cut using just clippers and a comb.
Make it fun. Make it calm. And remember – it’s just hair. It grows back.